Showing posts with label photos. Show all posts

22 May 2013

Audiovisual Aid


For years I've wanted to take and post videos of my work with the warp-weighted loom.  Until now, my access to technology required a second person to act as tripod and operator, and that hasn't worked out very well given the relationship that needed to exist between the camera and the work.  But today, thanks to advances in technology, I was able to take my first videos all by my ownself using Google Glass.

Most of what I took today isn't good enough to be postable.  The equipment limits each video to ten seconds in length, and I have to learn where to look and how close to get.  I'll be taking a lot more as I learn about how to take effective ones.

Here is a sample of the kind of videos that will come along as I am able to make them.  This particular video shows part of the dance that occurs in the Back Again (or Return) row of weaving.  After putting the weft through it, the countershed is dropped and the initial resting shed must reassert itself.  I strum the warp all the way across to help the threads shake themselves loose of one another.  This process makes two kinds of noises, the strumming sound and the clink of the loom weights as they rock and settle back into their resting position.


Stay tuned for more videos, hopefully within the week.

ETA:  Technical difficulties solved.

#throughglass

25 April 2013

Fall back and regroup

I'm back, baby!

Last May I had my first medium-sized problem with the project. It had been a growing problem for a while, but I was slow to put the pieces together to recognize what the real problem was. About the time I figured it out, and figured out how to fix it, Life intervened. In this past year of illness, family obligations, and deaths, I have been slow to return to my loom. But it's really hard to ignore a warped 7' loom in your dining room forever, and sooner or later I knew I'd have enough je ne sais quoi to deal with it. So I'm back.

The trouble had to do with those damned heddle rods.

I knitted the heddles back when I still had the warp weighted with one weight per inch, 12 ends per weight. Redistributing the weights so that they weighted an inch and a half of warp, 18 ends, was the right choice for the project, but it left me with a difficulty that I was slow to identify.

Many of the warp threads in the center of the project had broken and needed to be replaced. All of them came from the warp bundles attached to a particular pair of warp weights, the centermost front and the centermost back weight. I finally realized an Important Principle that I will have to remember for the next project. If you're going to use a pair of heddle rods instead of a single one (which I actually doubt I would do again, but that's another issue), it is important that the division of the warp between the two heddle rods occur at the same point as a division between warp bundles. Otherwise you'll get a mess that looks like this.

When I first warped, I followed the Important Principle. Somehow, though, when I re-weighted the warp I failed to realize how important the Important Principle really is! But I understand now. I have successfully repaired the broken warps, re-divided my warp, undone some heddles from the sinister heddle rod and re-knitted them onto the dexter heddle rod. Here's a photo of the re-knitted center of the warp, manipulated a bit so you can see clearly how clean the division is between the sides.


Notice that all the heddles on the upper (dexter) rod control threads on the left side of the central divide, which matches the division between the warp bundles on the fixed shed rod at the bottom of the photo. All the heddles on the lower (sinister) rod control the threads on the right side. I will no longer have the problem of a warp bundle whose strands are controlled partly by one heddle rod and partly by the other. I feel like an idiot that it took me so long to figure that out!

When the piece is finished and off the loom, there will be a lengthy period of repair weaving as I work out how to handle and weave in all those broken warps. Fortunately, that won't be nearly as challenging as the rectification process I just finished.

I think I am almost ready to recommence weaving. The next thing I need to do is read back in my entries and remind myself of what I'd worked out about the dance of it. Also, I'll need to move the piece of dining room furniture I recently inherited that currently stands right about where I did while I was weaving. But I feel greatly relieved that I have finally managed to fix the problem looming over my dining room. It's definitely worth the backache it gave me.

31 March 2012

First turn of the cloth beam

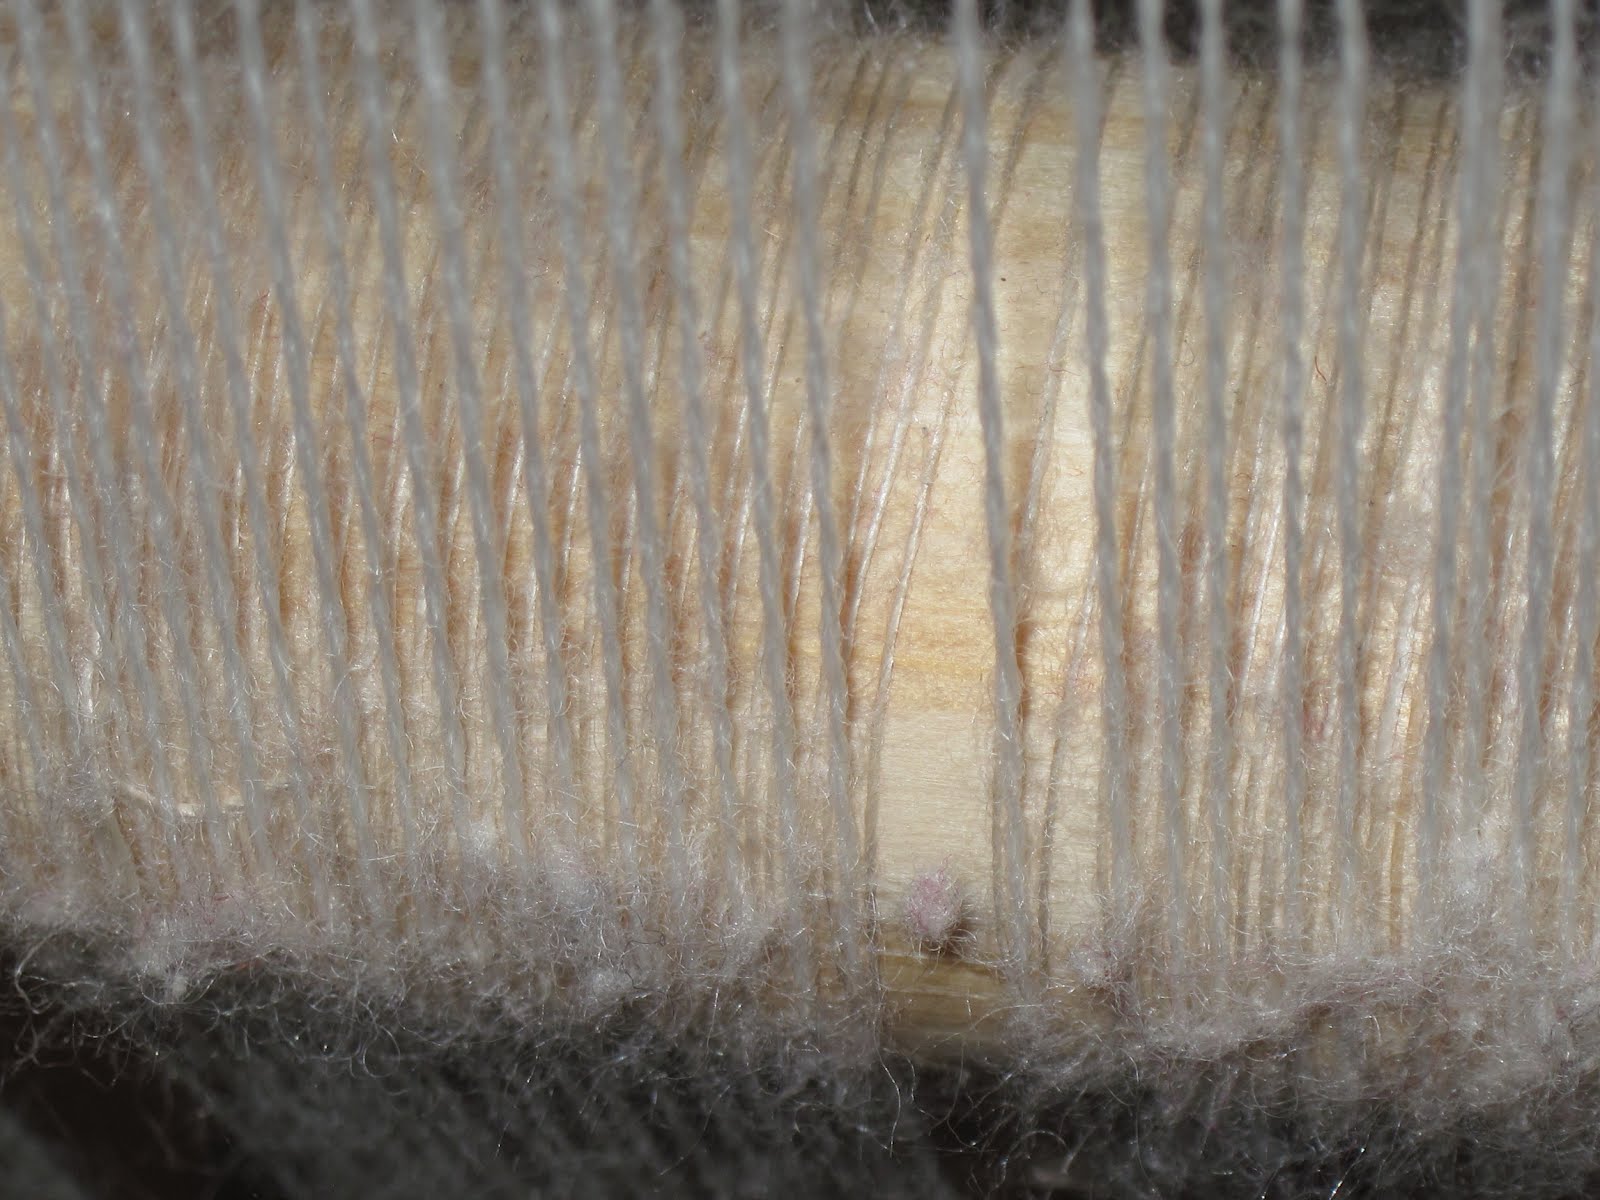
After 6" of weaving, it was time to make the first turn of the cloth beam. At first 6" was just an arbitrary marker, the goal I set for myself to weave before turning the beam. But then I looked at this.

Here you can see the buildup of fuzz on the shed rod. The warp is casting off fibers as it moves up and down in the shed rod lacing. Because this is a very nicely spun worsted yarn there are not a lot of loose fibers to shed, but it's still happening. Partly that's because of the way I beat. When I weave on the warp-weighted loom I don't actually "beat" the weft, I simply put the edge of the beater against the fell and press upward evenly until I feel that I am lifting the weight of the loom weights. Thus I make gravity and the loom weights work for me rather than expending all that whomp-whomp-whomp upward-beating energy that feels good to do but doesn't have as even and satisfactory a result--at least, not in my experience. YMMV. But my method does shift the front shed's worth of warp up and down slightly through its lacing, which encourages this slight fraying and build-up.

So it seems to me that it would be a good idea to turn the cloth beam rather frequently, in order to give each section of the warp threads as short a time as possible in that constraining position against the shed rod. Although I didn't take a photo of it, I also noticed some slight fuzz buildup on the heddles. I expect that frequent turning will save the warp threads from wear in that position also.

This is a shot of the warp after six inches had been woven but before any turning of the cloth beam had taken place.

This is how the warp looks after the first turning. It was a quarter-turn of the cloth beam (which is square in cross-section). Next time I think I'll try a half-turn.

One thing I have noticed about this project: there isn't a lot of fibery fluff building up under the loom the way there usually is when I weave on a warp-weighted loom. I think that's probably due, again, to the superior quality of this yarn. So far, the only thing we've had to vacuum out from under the loom has been cat hair. Mercifully, my cat is entirely disinterested in the enticingly dangled weights of this project, but somehow his hair gets under the loom anyway.

19 March 2012

That was painful

After weaving an inch's worth of picks (24), I took a close hard look at what I was getting. The last inch of warp at the left (dexter) selvedge was weighted twice as heavily as the rest of the warp. This was due to my seat-of-the-pants call that two inches of warp was an appropriate number of ends per warp weight.

However, the texture of the cloth at that more heavily weighted edge was completely different from, and preferable to, what I was getting elsewhere across the loom.

It was a hard decision, and I dithered for a couple of days before actually doing it. But I elected to untie and redistribute the weights across the entire warp. I didn't have enough extra loom weights to do the whole thing at 12 ends per weight, though. I did have enough to use an inch and a half (18 ends) per weight rather than the two inches (24 ends) that I had on the loom originally. So I've re-weighted the entire warp.

Now I'm working on beating that first "inch" of picks more tightly together, because it measures somewhat more than one inch in length. The heavily weighted area measured something less than an inch; I will also try to spread out the weft in that section a bit so the density is the same all the way across the warp. I am hoping I have found a happy medium that will give me a nice texture of (mostly) evenweave.

I'm also happy that the weights are distributed completely evenly across the warp now. Also, because it is more firmly stretched the warp makes a different and more clear sound now when I strum it. I feel much more optimistic about the project now.

Back to work!

11 March 2012

As promised

Here is a photo of the whole loom. It's in a location that's a little tight, a narrow dining area, so it's hard to get far enough away from the loom to get a really good shot. But you can get an idea of how things look now. You can see I have the two heddle rods in use. (To give you some idea of scale: each of those rods is four feet long.) This arrangement is a little bit fiddly for one person to operate, and I'm going to have to keep an eye out for it. But so far it's working all right.

That white blob just above the heddle rod on the left side of the warp is the penion, the shuttle. It is a cedar stick (a cut-down arrow shaft) with a very large cop of yarn wound onto it. It is resting atop the string heddles between the two sheds of the web.

Here is a closer view of the penion. It is 24" long. I enjoyed sticking it into this spot because it made the loom look more like the ones on the Amasis lekythos.

The first four wefts are purple-dyed wool. They're the reason the shadow under the cloth beam looks so deep; that's actually part of the cloth you're seeing and not a shadow. I wanted them in there because there's a textile from the Kerameikos at Athens which has a tiny purple stripe right under the starting border. I didn't have any trouble selling this idea to ὁ πάτρων (Il Patron)! You can see the rest of the ball of purple wool on the ground under the loom; I haven't detached it yet.

That little dark spot at the center top of the first photo is a glass bead in the shape of an owl that I hung from the reinforcing bar (which is out of view at the top of the loom). You've heard of computer totems, the little toys and figurines people stick atop their computers and monitors? Bubo there is my loom totem.

27 February 2012

Progress improving

Well, after I went and posted about how slowly this phase is going, yesterday I made a lot of headway. I credit the friends who came, brought amazing coffee, and hung out with me while I worked. The front shed is more than halfway laced to the shed rod now.


Here is a shot of the loom as it looks right now. You can see a lot of the front shed is now attached to the shed rod. You can also get a peek at the tumble of terracotta loom weights under the loom!


Here is a close-up of the front shed. It's a little hard to see because of the low contrast between the natural linen lacing thread and the pine closet rod. But if you look carefully you can see the cross of linen thread going over each wool warp end. At the right is the linen lacing thread that leads down to one of the two bobbins I'm using. You can also see that I've marked the shed rod in quarter-inch intervals.

20 February 2012

Safely secured


This is the hard part of what I did yesterday. Here you see the header band laced through every four threads to a stiffening bar. The bar is resting on top of the shed rod, just for convenience of photographing.

Normally I use a dowel as my stiffening rod. But with a warp six feet wide, it made more economic sense to use lumber than look for a dowel that long, and so this time I have a stiffening bar. This piece of lumber is a 1x2, which means it actually measures .75" by 1.5".

Originally I began using a stiffening rod on the warp-weighted loom for two reasons. First, it gave me better control over the header band than I had simply by stitching it to the holes of my Icelandic style loom's cloth beam. The holes in such a beam are fairly widely spaced. The one time I tried to attach a warp only through those holes, the header band scalloped so alarmingly (more than 3") after I weighted it that I decided that must not have been how it should be done. At the time I hadn't seen any museums' attempts to solve this problem, so I was interested to find out later that other people working with the warp-weighted loom had solved it in a way similar to mine, i.e., with the addition of a stiffening bar.

I also intended my warps to be removable from the loom. The Icelandic loom was built as a teaching and demo device. I wanted to be able to warp it and then, if necessary, remove my working warp entire in order to take the loom someplace and warp it with a teaching warp. By putting the header band on a stiffening rod, I found I could easily remove and roll up an entire warp, weights, chained spacers, heddle rods, skilskaft and all, and set it aside for later if necessary.

I don't intend this current warp, or indeed this loom, to be portable. However, I am so sold on the utility of the stiffening rod that I cannot imagine working a project without one.

It was, therefore, quite a delight to discover in the archaeological record an example of a header band that still retained stitching believed by the examiner to represent lacing to a stiffening rod.

17 February 2012

First photos

Here is a photo of a section of the header band and its enormous puddle of warp loops.


This closeup gives a better idea of the texture. This band was all hand-beaten, i.e., I did not use a shuttle or other tool, just my hand. You can see what I meant about the way the thread on one side of the header warp loosens. I'll be giving some more thought to that, and to my idea about twisting the warp threads in order to force that thread (actually, those two threads) back into place.


And this is for scale, so you get a sense of just how wide this little header band is. I'm used to making tablet-woven header bands, not warp-faced repp ones, and they've always been somewhat wider than this. Granted, the bulk of my header bands have been on teaching warps, which are intentionally at coarse setts to make it easier for people to see and manipulate the yarns.

Isn't it funny how the yarn goes from looking delicate in the first photo to looking coarse in the third?