The family situation that pulled my attention away from weaving for so long has improved, and I am finding I have space in my life again for challenging yet inessential activities. Since I last posted here I have acquired the reference article I needed to read, learned a lot more about pre-Roman tapestry weaves, and mentally solved the last questions I had about how to weave this project. More on these issues as I get closer to the parts of the project where they become relevant; suffice it to say, there has been a lot of string-related squeeing around here in the past month or so.
Today I mended six broken warp threads—again, all from the
center of the warp. Then I checked the whole warp to make sure it's all
in good weaving order. I will spend some time this afternoon reviewing
my posts and notes to help me re-learn the dance. I'm glad I left
myself those breadcrumbs!
Tomorrow I hope to resume weaving after I go pick up the book the library has on hold for me.
29 July 2015

22 May 2013
Audiovisual Aid
For years I've wanted to take and post videos of my work with the warp-weighted loom. Until now, my access to technology required a second person to act as tripod and operator, and that hasn't worked out very well given the relationship that needed to exist between the camera and the work. But today, thanks to advances in technology, I was able to take my first videos all by my ownself using Google Glass.
Most of what I took today isn't good enough to be postable. The equipment limits each video to ten seconds in length, and I have to learn where to look and how close to get. I'll be taking a lot more as I learn about how to take effective ones.
Here is a sample of the kind of videos that will come along as I am able to make them. This particular video shows part of the dance that occurs in the Back Again (or Return) row of weaving. After putting the weft through it, the countershed is dropped and the initial resting shed must reassert itself. I strum the warp all the way across to help the threads shake themselves loose of one another. This process makes two kinds of noises, the strumming sound and the clink of the loom weights as they rock and settle back into their resting position.
Stay tuned for more videos, hopefully within the week.
ETA: Technical difficulties solved.
#throughglass
21 May 2013
Baby Steps
Progress! The woven section measures just about exactly half its eventual length.
I only had to repair three threads this time. My speed is also improving as the nuances of the dance return to my working memory. But my stamina is down after so little appropriate exercise. I think I'm going to have brief weaving sessions for a while, just to build up my endurance again. I also need to set up my listening station again so I can have music while I weave. Singing along to something I love is the quickest way I know to get through a lot of physical work.
Almost every thread I've had to repair has been in the center of the web, in that problem area right where the two heddle rods abut. (I think there has been only one exception, a thread that caught by misadventure on a rough spot on the weaving sword.) This afternoon I thought longingly of what I could do if I were only weaving a cloak or a plain peplos rather than a garment with inwoven bands. After I took the piece off the loom, I'd stitch a false seam down that middle inch of problem warp and no one would be the wiser!
Now I'm going to go off and think pleasant math-y thoughts about yarn and dyestuffs and mordants. I was going to do that yesterday, but my scale wasn't working so I couldn't come up with any hard numbers. Now that the scale works, it's time to plot the dyeing phase of the project.
I only had to repair three threads this time. My speed is also improving as the nuances of the dance return to my working memory. But my stamina is down after so little appropriate exercise. I think I'm going to have brief weaving sessions for a while, just to build up my endurance again. I also need to set up my listening station again so I can have music while I weave. Singing along to something I love is the quickest way I know to get through a lot of physical work.
Almost every thread I've had to repair has been in the center of the web, in that problem area right where the two heddle rods abut. (I think there has been only one exception, a thread that caught by misadventure on a rough spot on the weaving sword.) This afternoon I thought longingly of what I could do if I were only weaving a cloak or a plain peplos rather than a garment with inwoven bands. After I took the piece off the loom, I'd stitch a false seam down that middle inch of problem warp and no one would be the wiser!
Now I'm going to go off and think pleasant math-y thoughts about yarn and dyestuffs and mordants. I was going to do that yesterday, but my scale wasn't working so I couldn't come up with any hard numbers. Now that the scale works, it's time to plot the dyeing phase of the project.
20 May 2013
Refusing to quit
After my last post I went off and looked over my notes to make sure I was remembering the dance properly. I wasn't, and it's a good thing I checked. But then the first time I tried to weave again another thread broke.
I admit it: I walked away again.
Ever since then I've been trying to think analytically about the project. Why is it so hard for me to just get back in there, fix the broken threads, and go back to weaving?
Some of my reluctance comes from the general lack of energy I've had to devote to anything other than interpersonal activity with my family this year. We really have faced unprecedented challenges. All right, acknowledge and move on. What else?
Partly the quality control geek inside me is having conniptions at all the repairs I'm having to do. After all this effort and expense, she says, what am I going to have to show for it? If I'm lucky, I'll have an indifferently made piece that is proof of concept rather than art. The quality control geek is never satisfied with imperfect work; I spend a lot of time squelching her so I can hear the muse a little more clearly. Lately I haven't had enough energy to squelch her, and so I was stuck in a bad place where the work just seemed like it was a case of diminishing returns.
But then the other night ὁ πάτρων (Il Patron) came for a visit. He wasn't there to visit the loom; it was purely a social call, and we all had a really good time watching "Jason and the Argonauts" in memory of Ray Harryhausen. Still, at one point he asked about my progress. Then I watched him walk over to it and gently touch the web. He looked at it with this combination of wonder and longing in his eyes. That right there, that is my antidote to the voice of the inner quality control geek. I had forgotten about the magic in this undertaking, and he reminded me about it without saying anything. OK, great; I'm over the hump of mid-project dejection. What else?
Well, after I got past the "this project sucks" moment, there were really only three other problems I could articulate. They all have to do with the tapestry woven portion of the project.
All my experience with tapestry weaving up to this point has been with small pieces. The piece on my tapestry loom right now, which is half done, is only about 6.5"x13". While I've become very comfortable estimating how much dyed weft I'll need for a project of that size or smaller, I really haven't even been able to face the fact that I have no clue how much dyed weft I'll need for the chiton band. Yesterday, though, an answer came to me: I will apply my mad math skillz!
The piece currently on my tapestry loom required me to dye four one-ounce skeins of weft. The weft I am using is a known quantity, and I've been working with it for years. Since I am more or less at the halfway point in that tapestry right now, all I have to do is weigh the unused balls of weft to find out (roughly) how much weft I've used so far. If I double that, I'll have how much weft is going to be required for the whole piece, i.e., 169 square inches of tapestry. Now, since I already ascertained that the tapestry section of the chiton will be at approximately the same sett as the other tapestry project, I just need to apply that math. I am planning for a band that goes from selvedge to selvedge and will be about 8" long, so I estimate that to be about 585 square inches of tapestry. That means I'll need about three and a half times as much weft for the chiton project as I do for the smaller piece. (Call it four, insists my inner quality control geek.)
Earlier today I went into the dining room to sit down at the table with some coffee and calculate these numbers. I was all excited about getting to do some good geeky textile math. But when I got there, the loom was staring at me forlornly. Was I going to have fun without it, right in front of it? So I decided to take my desire to do this math, to solve this problem, and let the doing of it be my reward for solving the prior problem of the broken warp thread.
Remember that broken thread? I mentioned it at the top of the entry. I fixed it this morning. And then I fixed six more that broke after it. I had to re-knit a heddle and unweave two passes too. But I finally got it all squared away. I wove two passes, a there-and-back-again, without anything breaking. It even looks pretty good considering how much the warp has been stressed lately.
Then I came in here to blog about my progress, which led sneakily to my doing the math live, in real time as I blogged about why it had been a problem. (I suppose that makes this a meta post too.) But I've still got two more points to make.
Another thing that worried me was dyestuffs. I knew I would be using two dyestuffs, one of which is in limited supply because I grew it myself. Yesterday I went looking for dyestuffs in the projects cabinet, the place where we keep all the weird raw materials: jet, soapstone, bone, beeswax, lamp black, calcium carbonate, dried herbs, oils, dyestuffs, that kind of stuff. I found plenty enough alum and dyestuffs to complete a pretty big project. And now that I know the actual size of the yarn pile I'll need to dye, I can relax. I have about twice as much dyestuff available as I will need for this project.
Now I finally have enough information that I can see my path forward, not just on the plain weaving but on the tapestry part. There's a lot of busy work involved in getting the yarn dyed. I can use busy work to progress with the project even on those days when I can't bring myself to weave. But hopefully I've solved enough of the technical problems that the weaving process isn't going to be difficult until I get to the beginning of the tapestry section.
Mustn't think about that yet, though. That's the last problem, the only thing I haven't even got a provisional solution for yet. Maybe I'll find a way to get ahold of the article I need to help me solve the riddle of the transition section.
I admit it: I walked away again.
Ever since then I've been trying to think analytically about the project. Why is it so hard for me to just get back in there, fix the broken threads, and go back to weaving?
Some of my reluctance comes from the general lack of energy I've had to devote to anything other than interpersonal activity with my family this year. We really have faced unprecedented challenges. All right, acknowledge and move on. What else?
Partly the quality control geek inside me is having conniptions at all the repairs I'm having to do. After all this effort and expense, she says, what am I going to have to show for it? If I'm lucky, I'll have an indifferently made piece that is proof of concept rather than art. The quality control geek is never satisfied with imperfect work; I spend a lot of time squelching her so I can hear the muse a little more clearly. Lately I haven't had enough energy to squelch her, and so I was stuck in a bad place where the work just seemed like it was a case of diminishing returns.
But then the other night ὁ πάτρων (Il Patron) came for a visit. He wasn't there to visit the loom; it was purely a social call, and we all had a really good time watching "Jason and the Argonauts" in memory of Ray Harryhausen. Still, at one point he asked about my progress. Then I watched him walk over to it and gently touch the web. He looked at it with this combination of wonder and longing in his eyes. That right there, that is my antidote to the voice of the inner quality control geek. I had forgotten about the magic in this undertaking, and he reminded me about it without saying anything. OK, great; I'm over the hump of mid-project dejection. What else?
Well, after I got past the "this project sucks" moment, there were really only three other problems I could articulate. They all have to do with the tapestry woven portion of the project.
All my experience with tapestry weaving up to this point has been with small pieces. The piece on my tapestry loom right now, which is half done, is only about 6.5"x13". While I've become very comfortable estimating how much dyed weft I'll need for a project of that size or smaller, I really haven't even been able to face the fact that I have no clue how much dyed weft I'll need for the chiton band. Yesterday, though, an answer came to me: I will apply my mad math skillz!
The piece currently on my tapestry loom required me to dye four one-ounce skeins of weft. The weft I am using is a known quantity, and I've been working with it for years. Since I am more or less at the halfway point in that tapestry right now, all I have to do is weigh the unused balls of weft to find out (roughly) how much weft I've used so far. If I double that, I'll have how much weft is going to be required for the whole piece, i.e., 169 square inches of tapestry. Now, since I already ascertained that the tapestry section of the chiton will be at approximately the same sett as the other tapestry project, I just need to apply that math. I am planning for a band that goes from selvedge to selvedge and will be about 8" long, so I estimate that to be about 585 square inches of tapestry. That means I'll need about three and a half times as much weft for the chiton project as I do for the smaller piece. (Call it four, insists my inner quality control geek.)
Earlier today I went into the dining room to sit down at the table with some coffee and calculate these numbers. I was all excited about getting to do some good geeky textile math. But when I got there, the loom was staring at me forlornly. Was I going to have fun without it, right in front of it? So I decided to take my desire to do this math, to solve this problem, and let the doing of it be my reward for solving the prior problem of the broken warp thread.
Remember that broken thread? I mentioned it at the top of the entry. I fixed it this morning. And then I fixed six more that broke after it. I had to re-knit a heddle and unweave two passes too. But I finally got it all squared away. I wove two passes, a there-and-back-again, without anything breaking. It even looks pretty good considering how much the warp has been stressed lately.
Then I came in here to blog about my progress, which led sneakily to my doing the math live, in real time as I blogged about why it had been a problem. (I suppose that makes this a meta post too.) But I've still got two more points to make.
Another thing that worried me was dyestuffs. I knew I would be using two dyestuffs, one of which is in limited supply because I grew it myself. Yesterday I went looking for dyestuffs in the projects cabinet, the place where we keep all the weird raw materials: jet, soapstone, bone, beeswax, lamp black, calcium carbonate, dried herbs, oils, dyestuffs, that kind of stuff. I found plenty enough alum and dyestuffs to complete a pretty big project. And now that I know the actual size of the yarn pile I'll need to dye, I can relax. I have about twice as much dyestuff available as I will need for this project.
Now I finally have enough information that I can see my path forward, not just on the plain weaving but on the tapestry part. There's a lot of busy work involved in getting the yarn dyed. I can use busy work to progress with the project even on those days when I can't bring myself to weave. But hopefully I've solved enough of the technical problems that the weaving process isn't going to be difficult until I get to the beginning of the tapestry section.
Mustn't think about that yet, though. That's the last problem, the only thing I haven't even got a provisional solution for yet. Maybe I'll find a way to get ahold of the article I need to help me solve the riddle of the transition section.
25 April 2013
Fall back and regroup
I'm back, baby!
Last May I had my first medium-sized problem with the project. It had been a growing problem for a while, but I was slow to put the pieces together to recognize what the real problem was. About the time I figured it out, and figured out how to fix it, Life intervened. In this past year of illness, family obligations, and deaths, I have been slow to return to my loom. But it's really hard to ignore a warped 7' loom in your dining room forever, and sooner or later I knew I'd have enough je ne sais quoi to deal with it. So I'm back.
The trouble had to do with those damned heddle rods.
I knitted the heddles back when I still had the warp weighted with one weight per inch, 12 ends per weight. Redistributing the weights so that they weighted an inch and a half of warp, 18 ends, was the right choice for the project, but it left me with a difficulty that I was slow to identify.
 Many of the warp threads in the center of the project had broken and needed to be replaced. All of them came from the warp bundles attached to a particular pair of warp weights, the centermost front and the centermost back weight. I finally realized an Important Principle that I will have to remember for the next project. If you're going to use a pair of heddle rods instead of a single one (which I actually doubt I would do again, but that's another issue), it is important that the division of the warp between the two heddle rods occur at the same point as a division between warp bundles. Otherwise you'll get a mess that looks like this.
When I first warped, I followed the Important Principle. Somehow, though, when I re-weighted the warp I failed to realize how important the Important Principle really is! But I understand now. I have successfully repaired the broken warps, re-divided my warp, undone some heddles from the sinister heddle rod and re-knitted them onto the dexter heddle rod. Here's a photo of the re-knitted center of the warp, manipulated a bit so you can see clearly how clean the division is between the sides.

Notice that all the heddles on the upper (dexter) rod control threads on the left side of the central divide, which matches the division between the warp bundles on the fixed shed rod at the bottom of the photo. All the heddles on the lower (sinister) rod control the threads on the right side. I will no longer have the problem of a warp bundle whose strands are controlled partly by one heddle rod and partly by the other. I feel like an idiot that it took me so long to figure that out!
When the piece is finished and off the loom, there will be a lengthy period of repair weaving as I work out how to handle and weave in all those broken warps. Fortunately, that won't be nearly as challenging as the rectification process I just finished.
I think I am almost ready to recommence weaving. The next thing I need to do is read back in my entries and remind myself of what I'd worked out about the dance of it. Also, I'll need to move the piece of dining room furniture I recently inherited that currently stands right about where I did while I was weaving. But I feel greatly relieved that I have finally managed to fix the problem looming over my dining room. It's definitely worth the backache it gave me.
Last May I had my first medium-sized problem with the project. It had been a growing problem for a while, but I was slow to put the pieces together to recognize what the real problem was. About the time I figured it out, and figured out how to fix it, Life intervened. In this past year of illness, family obligations, and deaths, I have been slow to return to my loom. But it's really hard to ignore a warped 7' loom in your dining room forever, and sooner or later I knew I'd have enough je ne sais quoi to deal with it. So I'm back.
The trouble had to do with those damned heddle rods.
I knitted the heddles back when I still had the warp weighted with one weight per inch, 12 ends per weight. Redistributing the weights so that they weighted an inch and a half of warp, 18 ends, was the right choice for the project, but it left me with a difficulty that I was slow to identify.

When I first warped, I followed the Important Principle. Somehow, though, when I re-weighted the warp I failed to realize how important the Important Principle really is! But I understand now. I have successfully repaired the broken warps, re-divided my warp, undone some heddles from the sinister heddle rod and re-knitted them onto the dexter heddle rod. Here's a photo of the re-knitted center of the warp, manipulated a bit so you can see clearly how clean the division is between the sides.

Notice that all the heddles on the upper (dexter) rod control threads on the left side of the central divide, which matches the division between the warp bundles on the fixed shed rod at the bottom of the photo. All the heddles on the lower (sinister) rod control the threads on the right side. I will no longer have the problem of a warp bundle whose strands are controlled partly by one heddle rod and partly by the other. I feel like an idiot that it took me so long to figure that out!
When the piece is finished and off the loom, there will be a lengthy period of repair weaving as I work out how to handle and weave in all those broken warps. Fortunately, that won't be nearly as challenging as the rectification process I just finished.
I think I am almost ready to recommence weaving. The next thing I need to do is read back in my entries and remind myself of what I'd worked out about the dance of it. Also, I'll need to move the piece of dining room furniture I recently inherited that currently stands right about where I did while I was weaving. But I feel greatly relieved that I have finally managed to fix the problem looming over my dining room. It's definitely worth the backache it gave me.
29 May 2012
Weighty matter
Another 6" woven, another half-turn of the cloth beam.
For the first time, I'm seeing a bit of wear on the warp yarns in the area where they are lashed to the shed rod. When the beam is turned and those points rise farther up the warp, I can clearly see a zone of slight fuzziness extending all across the warp surface. It's nothing to worry about, though, just the validation of my theory that frequent short advances are the best way to keep the fuzz factor down. Perhaps next time I shall advance after a shorter length of weaving. Since each half-turn of the cloth beam doesn't take up the whole 6" I have woven, I have a little extra web to take up anyway.
It's also time to lengthen the warp now. I've only done about ten weights' worth of lengthening so far, but I should easily be able to accomplish the rest tomorrow.
Here is one of those points at which I appreciate my tendency to cultivate repeatability in my movements. (Some would call it obsession or compulsion; I prefer to think of it as consistency!) Because of the way I chained the excess warp, I can maintain my same approximate weight arrangement by undoing the same number of chain loops in each warp hank. So far that's worked out really well, although I think I miscounted on one hank because the weight hangs lower in comparison to its neighbors than it did before I lengthened the warp. That will probably bother me sufficiently tomorrow, in the bright light of day, than it did around sunset today. I will likely undo that one and fix it.
But for the most part, warp lengthening is an automatic practice with a high repeatability factor. That means I can do it while there is pretty much any kind of background distraction: spouse, offspring, visitors, audiovisual media, it's all good. Perhaps I will be sociable tomorrow!
For the first time, I'm seeing a bit of wear on the warp yarns in the area where they are lashed to the shed rod. When the beam is turned and those points rise farther up the warp, I can clearly see a zone of slight fuzziness extending all across the warp surface. It's nothing to worry about, though, just the validation of my theory that frequent short advances are the best way to keep the fuzz factor down. Perhaps next time I shall advance after a shorter length of weaving. Since each half-turn of the cloth beam doesn't take up the whole 6" I have woven, I have a little extra web to take up anyway.
It's also time to lengthen the warp now. I've only done about ten weights' worth of lengthening so far, but I should easily be able to accomplish the rest tomorrow.
Here is one of those points at which I appreciate my tendency to cultivate repeatability in my movements. (Some would call it obsession or compulsion; I prefer to think of it as consistency!) Because of the way I chained the excess warp, I can maintain my same approximate weight arrangement by undoing the same number of chain loops in each warp hank. So far that's worked out really well, although I think I miscounted on one hank because the weight hangs lower in comparison to its neighbors than it did before I lengthened the warp. That will probably bother me sufficiently tomorrow, in the bright light of day, than it did around sunset today. I will likely undo that one and fix it.
But for the most part, warp lengthening is an automatic practice with a high repeatability factor. That means I can do it while there is pretty much any kind of background distraction: spouse, offspring, visitors, audiovisual media, it's all good. Perhaps I will be sociable tomorrow!
23 May 2012
The dance continues
(Warning: this one is very geeky.)
The piece is more than 25% woven now; last night we turned the cloth beam again. Another turn and it will be time to unchain and lengthen the warp.
Draw-in is now visible and obvious, since the recently woven web is now wound over a layer of previously woven web. It's about 1" narrower at each side now. I'm not worried about this from a construction viewpoint, because I figured in a 10% draw-in when I was making calculations. But it does mean the top corners of the chiton will have a slightly trapezoidal effect. Hopefully nobody will be looking at the top edge anyway.
During this recent period when I wasn't weaving on a regular basis, something happened to my understanding of the dance. I've now hit on a sequence that is a great deal faster than the previous ones I tried. I've just about doubled my most recently clocked speed for a "there and back again" pass. Now it only takes two and a half minutes rather than five.
Here's what I'm currently doing. I wrap the left selvedge, then put the penion through the natural shed. I use the comb to loosely beat the weft into place, still on the open shed. Then I wrap the right selvedge, and here's where it gets a little tricky. With my left hand I pull and hold the sinister (rightmost) shed rod. I place the penion on the natural shelf formed by the heddles. With my right hand I take the weaving sword and draw it through the countershed, clearing any sticky yarns. Then I put the sword under my left arm, pick up the penion, and put it through the countershed. I drop the first shed rod, move to my left, and repeat the process with the second shed rod. Then I move back to the sinister edge of the warp, drawing the tip of the sword across the threads as I go as if I were using a pin beater. This helps the countershed fall back into place so the original, natural shed is clear again.
I beat in sequence from the sinister selvedge. Holding the handle of the sword in my right hand, I put the blade in the natural shed at about a 45 degree angle to the fell, with the hilt nearest the fell at the selvedge edge. Then I lever the point of the sword upward with my left hand. When the flat of the sword meets the fell, I push up gently, just until I feel the weights moving. Then I step to my left and repeat the process. It takes from four to six such movements to cross the entire warp, depending on how the weft thread lies.
You'll notice here that in both passes I am beating from the attached toward the free end of the weft. This is a trick I learned while weaving rutevev tapestries. I usually use my free hand to adjust the weft tension while I beat in this fashion. Managing the tension in this fashion helps me produce cleaner, straighter selvedges with less draw-in than any other method I've tried. Beating this way adds some walking to the process, because it means I have to cross the loom (from dexter to sinister) twice: once after passing the second weft and again after I've beaten to leave the sword at the sinister end of the loom. However, the speed I gain by not having to manipulate the sheds as much more than makes up for it.
Besides, the weavers of the Classical literature all walked up and down at their looms. Next I should work on being able to sing as I go.
The piece is more than 25% woven now; last night we turned the cloth beam again. Another turn and it will be time to unchain and lengthen the warp.
Draw-in is now visible and obvious, since the recently woven web is now wound over a layer of previously woven web. It's about 1" narrower at each side now. I'm not worried about this from a construction viewpoint, because I figured in a 10% draw-in when I was making calculations. But it does mean the top corners of the chiton will have a slightly trapezoidal effect. Hopefully nobody will be looking at the top edge anyway.
During this recent period when I wasn't weaving on a regular basis, something happened to my understanding of the dance. I've now hit on a sequence that is a great deal faster than the previous ones I tried. I've just about doubled my most recently clocked speed for a "there and back again" pass. Now it only takes two and a half minutes rather than five.
Here's what I'm currently doing. I wrap the left selvedge, then put the penion through the natural shed. I use the comb to loosely beat the weft into place, still on the open shed. Then I wrap the right selvedge, and here's where it gets a little tricky. With my left hand I pull and hold the sinister (rightmost) shed rod. I place the penion on the natural shelf formed by the heddles. With my right hand I take the weaving sword and draw it through the countershed, clearing any sticky yarns. Then I put the sword under my left arm, pick up the penion, and put it through the countershed. I drop the first shed rod, move to my left, and repeat the process with the second shed rod. Then I move back to the sinister edge of the warp, drawing the tip of the sword across the threads as I go as if I were using a pin beater. This helps the countershed fall back into place so the original, natural shed is clear again.
I beat in sequence from the sinister selvedge. Holding the handle of the sword in my right hand, I put the blade in the natural shed at about a 45 degree angle to the fell, with the hilt nearest the fell at the selvedge edge. Then I lever the point of the sword upward with my left hand. When the flat of the sword meets the fell, I push up gently, just until I feel the weights moving. Then I step to my left and repeat the process. It takes from four to six such movements to cross the entire warp, depending on how the weft thread lies.
You'll notice here that in both passes I am beating from the attached toward the free end of the weft. This is a trick I learned while weaving rutevev tapestries. I usually use my free hand to adjust the weft tension while I beat in this fashion. Managing the tension in this fashion helps me produce cleaner, straighter selvedges with less draw-in than any other method I've tried. Beating this way adds some walking to the process, because it means I have to cross the loom (from dexter to sinister) twice: once after passing the second weft and again after I've beaten to leave the sword at the sinister end of the loom. However, the speed I gain by not having to manipulate the sheds as much more than makes up for it.
Besides, the weavers of the Classical literature all walked up and down at their looms. Next I should work on being able to sing as I go.
22 May 2012
1 + 1 = Too Long Away
I had a technical problem along about the time that family obligations spiked, which led to me eyeing but not touching the loom for a while. I'm back now.
The technical problem I experienced involved those selvedge yarns. While I had no trouble with their unspinning themselves, they did nevertheless loosen. The Navajo warp is so loosely spun that it slowly lengthened and eventually pulled apart. After I'd mended a selvedge thread for the third time, I decided to replace rather than repair.
First I needed a good replacement yarn. I found something at the local yarn shop that would serve: Kraemer Natural Skeins Eileen, a DK-weight merino yarn. It is tightly three-plied, soft but not at all delicate, and the appropriate off-white color of undyed wool. (After this project is over, I'll come up with some interesting way to use the rest of it; it's not a bad weight for nålebinding.) Instead of the two ends of Navajo warp per selvedge, I'm using two ends of this yarn per selvedge.
The second challenge was to replace the selvedge yarn. Using a tapestry needle, I tried threading one end up through the woven selvedges to parallel the Navajo yarn. The selvedges are in a wrapped technique (two additional turns of yarn between each pick), which means I had a lot of tiny weft loops through which to stick the needle. Standing on my little wooden stool and doing that was such fiddly work that I gave it up after an inch's worth. Instead, I anchored the new selvedge yarn around the warp beam, leaving a generous unworked end at the top. Then I weighted the new selvedges, put them where they belonged, and set the loom to rights.
When I remove the web from the loom, the first thing I will do is, as they say in the weaving magazines, "correct the errors." I'll start by threading that unworked end of each new selvedge yarn through the weft loops in a way that does not involve me teetering on a stool with arms outstretched leaning forward against thin air. (Tables are a grand human invention, and I wonder that we fiber folk do not make more use of them than we do.) Then I'll remove the vestiges of the old selvedge yarns. Then I'll fix any warp threads that have had to be repaired.
Oh yes, warp repairs. So far three warp yarns have broken. They all belong to one weight hanging at the back of the loom, i.e., they all come from the heddled back layer rather than the laced front layer. (I expected that broken warps would occur with the laced layer, which is secured firmly at a fixed point rather than movable, but so far that layer has held up beautifully.) The weight in question comes from the central point of the warp, the area where the two shed sticks overlap, the area I have to baby along with every change of shed. This area is subjected to more movement, stress, and displacement than the rest of the warp combined; it's not surprising that even this really high quality warp yarn is showing signs of wear. Fortunately, I have some experience fixing broken warps on my horizontal loom. The same principle applies here, so I'm not sweating it. If warps continue to break in that area, though, it could become a problem.
With about a foot of weaving done, I have to say that I'm not entirely convinced about the theory of using two short shed rods rather than one long one on a wide warp. My experience so far suggests it's more of a hassle than otherwise. The central two inches of the warp display a much looser sett than the rest of the warp, which is not surprising given how much more manipulation it undergoes than the rest of the warp does. Since I'll be working in that area to rectify the broken warps, maybe I'll also be able to ease the sett a little closer, drawing from the surrounding area where the sett is (naturally) a little tighter.
On the other hand, perhaps if both the rods were pulled at the same time, as by two weavers working side by side, it might be a fine solution. But for one weaver working alone at a wide warp, I'm just not sure this is the way to do it. But then, that was the whole point of this project, wasn't it? I'm looking for proof (or not) of concepts.
The technical problem I experienced involved those selvedge yarns. While I had no trouble with their unspinning themselves, they did nevertheless loosen. The Navajo warp is so loosely spun that it slowly lengthened and eventually pulled apart. After I'd mended a selvedge thread for the third time, I decided to replace rather than repair.
First I needed a good replacement yarn. I found something at the local yarn shop that would serve: Kraemer Natural Skeins Eileen, a DK-weight merino yarn. It is tightly three-plied, soft but not at all delicate, and the appropriate off-white color of undyed wool. (After this project is over, I'll come up with some interesting way to use the rest of it; it's not a bad weight for nålebinding.) Instead of the two ends of Navajo warp per selvedge, I'm using two ends of this yarn per selvedge.
The second challenge was to replace the selvedge yarn. Using a tapestry needle, I tried threading one end up through the woven selvedges to parallel the Navajo yarn. The selvedges are in a wrapped technique (two additional turns of yarn between each pick), which means I had a lot of tiny weft loops through which to stick the needle. Standing on my little wooden stool and doing that was such fiddly work that I gave it up after an inch's worth. Instead, I anchored the new selvedge yarn around the warp beam, leaving a generous unworked end at the top. Then I weighted the new selvedges, put them where they belonged, and set the loom to rights.
When I remove the web from the loom, the first thing I will do is, as they say in the weaving magazines, "correct the errors." I'll start by threading that unworked end of each new selvedge yarn through the weft loops in a way that does not involve me teetering on a stool with arms outstretched leaning forward against thin air. (Tables are a grand human invention, and I wonder that we fiber folk do not make more use of them than we do.) Then I'll remove the vestiges of the old selvedge yarns. Then I'll fix any warp threads that have had to be repaired.
Oh yes, warp repairs. So far three warp yarns have broken. They all belong to one weight hanging at the back of the loom, i.e., they all come from the heddled back layer rather than the laced front layer. (I expected that broken warps would occur with the laced layer, which is secured firmly at a fixed point rather than movable, but so far that layer has held up beautifully.) The weight in question comes from the central point of the warp, the area where the two shed sticks overlap, the area I have to baby along with every change of shed. This area is subjected to more movement, stress, and displacement than the rest of the warp combined; it's not surprising that even this really high quality warp yarn is showing signs of wear. Fortunately, I have some experience fixing broken warps on my horizontal loom. The same principle applies here, so I'm not sweating it. If warps continue to break in that area, though, it could become a problem.
With about a foot of weaving done, I have to say that I'm not entirely convinced about the theory of using two short shed rods rather than one long one on a wide warp. My experience so far suggests it's more of a hassle than otherwise. The central two inches of the warp display a much looser sett than the rest of the warp, which is not surprising given how much more manipulation it undergoes than the rest of the warp does. Since I'll be working in that area to rectify the broken warps, maybe I'll also be able to ease the sett a little closer, drawing from the surrounding area where the sett is (naturally) a little tighter.
On the other hand, perhaps if both the rods were pulled at the same time, as by two weavers working side by side, it might be a fine solution. But for one weaver working alone at a wide warp, I'm just not sure this is the way to do it. But then, that was the whole point of this project, wasn't it? I'm looking for proof (or not) of concepts.
31 March 2012
First turn of the cloth beam
After 6" of weaving, it was time to make the first turn of the cloth beam. At first 6" was just an arbitrary marker, the goal I set for myself to weave before turning the beam. But then I looked at this.
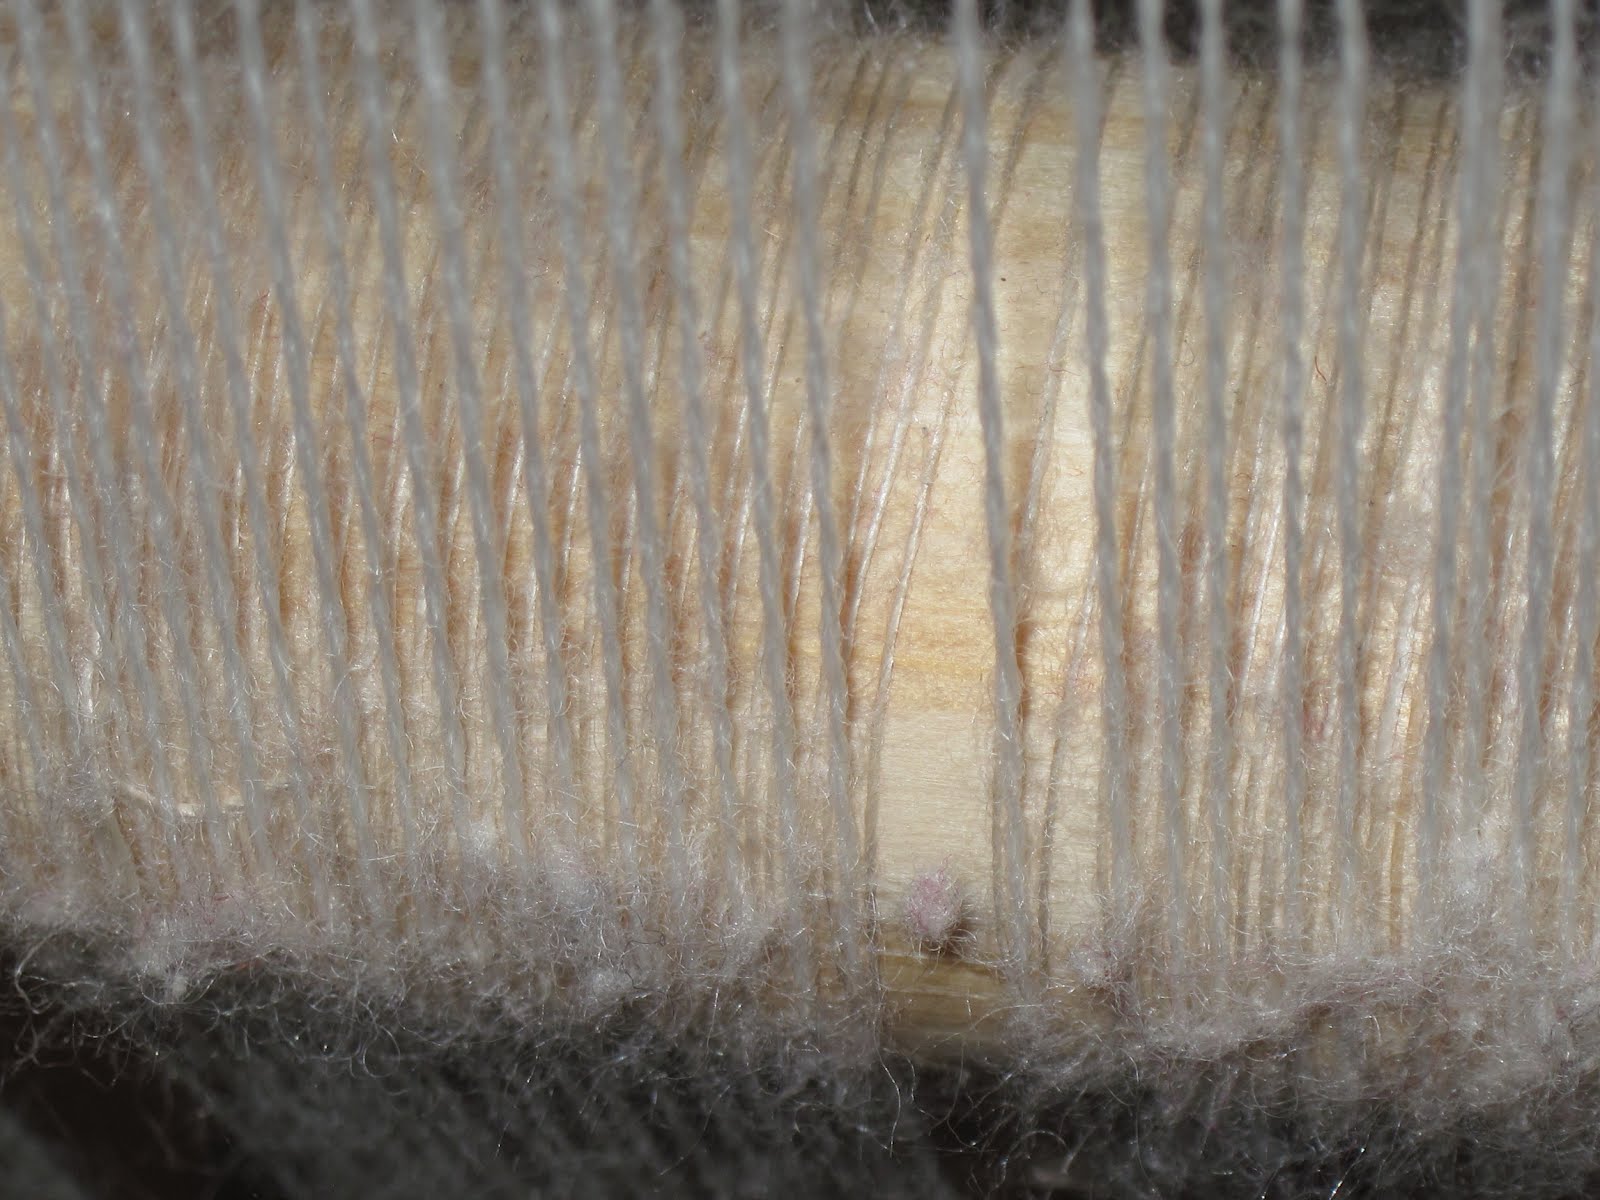
 Here you can see the buildup of fuzz on the shed rod. The warp is casting off fibers as it moves up and down in the shed rod lacing. Because this is a very nicely spun worsted yarn there are not a lot of loose fibers to shed, but it's still happening. Partly that's because of the way I beat. When I weave on the warp-weighted loom I don't actually "beat" the weft, I simply put the edge of the beater against the fell and press upward evenly until I feel that I am lifting the weight of the loom weights. Thus I make gravity and the loom weights work for me rather than expending all that whomp-whomp-whomp upward-beating energy that feels good to do but doesn't have as even and satisfactory a result--at least, not in my experience. YMMV. But my method does shift the front shed's worth of warp up and down slightly through its lacing, which encourages this slight fraying and build-up.
So it seems to me that it would be a good idea to turn the cloth beam rather frequently, in order to give each section of the warp threads as short a time as possible in that constraining position against the shed rod. Although I didn't take a photo of it, I also noticed some slight fuzz buildup on the heddles. I expect that frequent turning will save the warp threads from wear in that position also.
 This is a shot of the warp after six inches had been woven but before any turning of the cloth beam had taken place.
 This is how the warp looks after the first turning. It was a quarter-turn of the cloth beam (which is square in cross-section). Next time I think I'll try a half-turn.
One thing I have noticed about this project: there isn't a lot of fibery fluff building up under the loom the way there usually is when I weave on a warp-weighted loom. I think that's probably due, again, to the superior quality of this yarn. So far, the only thing we've had to vacuum out from under the loom has been cat hair. Mercifully, my cat is entirely disinterested in the enticingly dangled weights of this project, but somehow his hair gets under the loom anyway.
So it seems to me that it would be a good idea to turn the cloth beam rather frequently, in order to give each section of the warp threads as short a time as possible in that constraining position against the shed rod. Although I didn't take a photo of it, I also noticed some slight fuzz buildup on the heddles. I expect that frequent turning will save the warp threads from wear in that position also.


One thing I have noticed about this project: there isn't a lot of fibery fluff building up under the loom the way there usually is when I weave on a warp-weighted loom. I think that's probably due, again, to the superior quality of this yarn. So far, the only thing we've had to vacuum out from under the loom has been cat hair. Mercifully, my cat is entirely disinterested in the enticingly dangled weights of this project, but somehow his hair gets under the loom anyway.
27 March 2012
The honeymoon is over
One can only weave so long before a warp breaks. Yesterday I had a selvedge break, and today a regular warp broke.
The selvedge telegraphed its intention by stretching over the course of a day or two until the weight was resting on the ground. I used a pair of Navajo warp singles yarns for each selvedge. It's more loosely spun than I like, but it was the best choice I had. So now I know it's going to be troublesome and I can keep an eye out for it. I may wind up having to put some more twist into it to keep its integrity. It is, however, not unspinning itself; those warp weights are remarkably good at staying in place. It probably has something to do with those flat sides that snuggle up against their neighbors.
The regular warp break was due to a rough spot in one of my wooden tools. It caught on one ply of a warp thread and stretched it until it broke. I tried splicing the warp back together, but there wasn't much to work with and so I wound up knotting in a repair section. Luckily, it's on the back of the chiton.
I shall have to work on smoothing that rough spot down before it eats any more warps.
The good news is, I have six inches of woven cloth. That's an eighth of the project. There's a tiny piece of me that never thought I'd get this far, so I'm pretty stoked.
The next task is to even out the warp spacing in the woven cloth before reeling some of it up onto the cloth beam. This is a surprisingly easy task, readily accomplished by the pointed end of just about any tool. (I like the bone needle best for this purpose.) I can even do it with my fingers in the areas near the selvedge. But even if I can't get the warp distributed as evenly as I'd like, I'm not going to worry. Irregularities are inevitable according to what I've read. Particularly, Martin Ciszuk talks about his experience with the occurrence of "denser and more open warp areas" in his reconstructed weaves, just as he says are found on archaeological and ethnographic examples.
The selvedge telegraphed its intention by stretching over the course of a day or two until the weight was resting on the ground. I used a pair of Navajo warp singles yarns for each selvedge. It's more loosely spun than I like, but it was the best choice I had. So now I know it's going to be troublesome and I can keep an eye out for it. I may wind up having to put some more twist into it to keep its integrity. It is, however, not unspinning itself; those warp weights are remarkably good at staying in place. It probably has something to do with those flat sides that snuggle up against their neighbors.
The regular warp break was due to a rough spot in one of my wooden tools. It caught on one ply of a warp thread and stretched it until it broke. I tried splicing the warp back together, but there wasn't much to work with and so I wound up knotting in a repair section. Luckily, it's on the back of the chiton.
I shall have to work on smoothing that rough spot down before it eats any more warps.
The good news is, I have six inches of woven cloth. That's an eighth of the project. There's a tiny piece of me that never thought I'd get this far, so I'm pretty stoked.
The next task is to even out the warp spacing in the woven cloth before reeling some of it up onto the cloth beam. This is a surprisingly easy task, readily accomplished by the pointed end of just about any tool. (I like the bone needle best for this purpose.) I can even do it with my fingers in the areas near the selvedge. But even if I can't get the warp distributed as evenly as I'd like, I'm not going to worry. Irregularities are inevitable according to what I've read. Particularly, Martin Ciszuk talks about his experience with the occurrence of "denser and more open warp areas" in his reconstructed weaves, just as he says are found on archaeological and ethnographic examples.
24 March 2012
Starting to get the hang of this
There is a noticeable area of completed web visible on the loom now; I've done one-sixteenth of the length. Along the way I've started to develop some rhythms, some ergonomics, what I think of as "the dance." Every different weaving project has its own dance steps, although there are families of projects just as there are families of dance steps.
This weaving project is a little bit more stately and elaborate than some, more a pavane than The Hustle. I'm clocking one pair of wefts (a There and Back Again, if you will) every five minutes. There is a great deal faster and easier than Back Again!
But there is plenty of dance floor left upon which I may become more proficient at these steps, as I hope I will. My speed already seems blindingly fast compared to how I was doing the same things last week.
This weaving project is a little bit more stately and elaborate than some, more a pavane than The Hustle. I'm clocking one pair of wefts (a There and Back Again, if you will) every five minutes. There is a great deal faster and easier than Back Again!
But there is plenty of dance floor left upon which I may become more proficient at these steps, as I hope I will. My speed already seems blindingly fast compared to how I was doing the same things last week.
22 March 2012
ARGH!
I need a copy of an article in an issue of Bulletin du CIETA. Unfortunately, that back issue is out of print according to CIETA, so I can't just buy a copy. And there's not a library within several hundred miles that has a subscription.
*drums feet on floor helplessly*
Oh well, back to weaving.
*drums feet on floor helplessly*
Oh well, back to weaving.
21 March 2012
Spinning fates and the Song of the Loom
I really want to go to this:
Spinning Fates and the song of the Loom: the use of textiles, clothing and cloth production as metaphor, symbol and narrative device in Greek and Latin literature.
A one day round-table (June 1st) at the Danish National Research Foundation's Centre for Textile Research.
It's a bit far to go for a day-trip, though. Alas.
Spinning Fates and the song of the Loom: the use of textiles, clothing and cloth production as metaphor, symbol and narrative device in Greek and Latin literature.
A one day round-table (June 1st) at the Danish National Research Foundation's Centre for Textile Research.
It's a bit far to go for a day-trip, though. Alas.
19 March 2012
That was painful
After weaving an inch's worth of picks (24), I took a close hard look at what I was getting. The last inch of warp at the left (dexter) selvedge was weighted twice as heavily as the rest of the warp. This was due to my seat-of-the-pants call that two inches of warp was an appropriate number of ends per warp weight.
 However, the texture of the cloth at that more heavily weighted edge was completely different from, and preferable to, what I was getting elsewhere across the loom.
It was a hard decision, and I dithered for a couple of days before actually doing it. But I elected to untie and redistribute the weights across the entire warp. I didn't have enough extra loom weights to do the whole thing at 12 ends per weight, though. I did have enough to use an inch and a half (18 ends) per weight rather than the two inches (24 ends) that I had on the loom originally. So I've re-weighted the entire warp.
Now I'm working on beating that first "inch" of picks more tightly together, because it measures somewhat more than one inch in length. The heavily weighted area measured something less than an inch; I will also try to spread out the weft in that section a bit so the density is the same all the way across the warp. I am hoping I have found a happy medium that will give me a nice texture of (mostly) evenweave.
I'm also happy that the weights are distributed completely evenly across the warp now. Also, because it is more firmly stretched the warp makes a different and more clear sound now when I strum it. I feel much more optimistic about the project now.
Back to work!

It was a hard decision, and I dithered for a couple of days before actually doing it. But I elected to untie and redistribute the weights across the entire warp. I didn't have enough extra loom weights to do the whole thing at 12 ends per weight, though. I did have enough to use an inch and a half (18 ends) per weight rather than the two inches (24 ends) that I had on the loom originally. So I've re-weighted the entire warp.
Now I'm working on beating that first "inch" of picks more tightly together, because it measures somewhat more than one inch in length. The heavily weighted area measured something less than an inch; I will also try to spread out the weft in that section a bit so the density is the same all the way across the warp. I am hoping I have found a happy medium that will give me a nice texture of (mostly) evenweave.
I'm also happy that the weights are distributed completely evenly across the warp now. Also, because it is more firmly stretched the warp makes a different and more clear sound now when I strum it. I feel much more optimistic about the project now.
Back to work!
12 March 2012
The dance begins
I've got almost an inch woven now and am tinkering with the process, the dance of it to see what I think works.
One thing I'm considering is tool use. I'm playing with a lot of different tools.
I have used a simple, blunt bone needle to help straighten out the areas where warp bunches together. That works really well, and it makes a pleasant sound that makes me think of the Homeric phrase of a warp "singing." But strumming the web between pairs of warp ends is laborious work, not something I expect should be part of the dance accompanying each pass of the weft. I am hoping that once the first couple of inches are woven there will be less of this kind of warp bunching.
On the other hand, the analyses I've seen of the period textiles indicate quite a lot of variation in thread count within a textile, with airier and more dense sections coexisting side by side. This isn't very surprising considering that the yarn I'm using, a 20/2, is at least double the thickness of many of the yarns from the extant textiles. My thread count and yarn size are not outside the historic range, but they are not representive of its finer end, nor even of its median. The yarns in the period textiles are so fine that they would have been even more likely to bunch than mine, I think. In fact, I'm guessing they would have had to be laced to the shed rod in groups rather than individually, just because there wouldn't be enough room on the shed rod for cross-lacing every single warp end on a warp with that high an epi (ends per inch) count.
I began by using my Anglo-Scandinavian pin beater but decided to stop doing that because it didn't match any evidence I'd seen for ancient Greek weaving. I usually use it more for weft placement than anything else, and my finger also works well for that task.
I have used my sword beater too. But it's a great hulking wooden broadsword that looks like the Norwegian whalebone sword beaters. It works wonders on twill webs. I've never found it as useful for tabby weaving, though; something shorter seems to work better for that. Also, as with the pin beater, I don't want to rely on it because it's not canonical.
So instead I'm using a flat wooden stick that is similar to the finds identified as beaters. The so-called beaters are narrow bone implements, not very long. I have a beautiful maple pick-up stick in about the right size range, although it lacks the hole drilled through one end that several of the bone implements have. I am not sure about the identity of those bone pieces as beaters; the beater shown in the Amasis lekythos is significantly longer than the proposed length of those bone beaters. Nevertheless, I'm willing to experiment with a tool of that size and shape to see what it tells me.
I'm also using a wooden comb. When I do tapestry weaving I usually use a light beater, and this wooden comb has been ideal for that purpose. I expect I'll be using it later when I get to the decorative bands portion of the chiton. Right now I'm using it to help me get a sense for how much tension and take-up I need in wefts. Using it is slow, but it's helping me learn a lot.
I expect that after two, maybe three inches of very laborious weaving I'll have evolved some sort of system that works and is reasonably paced. Right now progress is very slow indeed. Partly that's because the weaving has to fit around family life (in the dining room, which seems to be the center of the house), but partly it's simply because I haven't learned the dance. At any rate, I expected it and I'm not worried about it yet.
11 March 2012
As promised

That white blob just above the heddle rod on the left side of the warp is the penion, the shuttle. It is a cedar stick (a cut-down arrow shaft) with a very large cop of yarn wound onto it. It is resting atop the string heddles between the two sheds of the web.

The first four wefts are purple-dyed wool. They're the reason the shadow under the cloth beam looks so deep; that's actually part of the cloth you're seeing and not a shadow. I wanted them in there because there's a textile from the Kerameikos at Athens which has a tiny purple stripe right under the starting border. I didn't have any trouble selling this idea to ὁ πάτρων (Il Patron)! You can see the rest of the ball of purple wool on the ground under the loom; I haven't detached it yet.
That little dark spot at the center top of the first photo is a glass bead in the shape of an owl that I hung from the reinforcing bar (which is out of view at the top of the loom). You've heard of computer totems, the little toys and figurines people stick atop their computers and monitors? Bubo there is my loom totem.
06 March 2012
Unexpected progress!
Last night's meeting was cancelled so I had more time to work on heddles.
All the heddles are done, and the shed is clean!
I put in the first two shots of weft. Tomorrow I'll take a photo.
All the heddles are done, and the shed is clean!
I put in the first two shots of weft. Tomorrow I'll take a photo.
05 March 2012
Still slogging away....
Half the heddles are knit. I have a lot of obligations in the next 24 hours or so, so I'm not sure I'm going to get much more progress made before Wednesday. But I'm happy with my progress so far. The linen I chose to knit the heddles with is cooperating well, and the heddles are mostly very even. When you have to knit more than 800 heddles, you want a lot of consistency.
I am using the split heddle rod approach. Instead of one long heddle rod that goes across the whole six feet of warp, I'm using two, one on each half of the warp. I'm a little dubious about this approach since it's only a theoretical rather than a documentable approach. Still, it makes more sense than trying to operate a two-person sized warp and heddle rod all by myself without brackets, heddle rod supports, or anything else to hold the rod. From my experience weaving tabby on the Icelandic loom, though, I know it is possible to operate the heddle rod of a narrow warp one-handed while using the sword to secure the shed. I have tested and yes, I can move the current three-foot heddle rod one-handed. What a relief! I was afraid there'd be too much counterweight on the rod for it to be comfortable.
The fiddly part will be at the center of the warp, where the ends of the two heddle rods might overlap or bash one another. I'm solving that by making the dexter side's rod higher than the sinister side's rod.
Once the loom is entirely ready to weave, I'll post a full photo.
I am using the split heddle rod approach. Instead of one long heddle rod that goes across the whole six feet of warp, I'm using two, one on each half of the warp. I'm a little dubious about this approach since it's only a theoretical rather than a documentable approach. Still, it makes more sense than trying to operate a two-person sized warp and heddle rod all by myself without brackets, heddle rod supports, or anything else to hold the rod. From my experience weaving tabby on the Icelandic loom, though, I know it is possible to operate the heddle rod of a narrow warp one-handed while using the sword to secure the shed. I have tested and yes, I can move the current three-foot heddle rod one-handed. What a relief! I was afraid there'd be too much counterweight on the rod for it to be comfortable.
The fiddly part will be at the center of the warp, where the ends of the two heddle rods might overlap or bash one another. I'm solving that by making the dexter side's rod higher than the sinister side's rod.
Once the loom is entirely ready to weave, I'll post a full photo.
01 March 2012
Warp is weighted!
I have finished putting the weights on the warp -- all except for the selvedges, that is. Each selvedge is a pair of heavy single-ply wool yarns. I'm not sure they're strong enough to use a whole loomweight for each one, but I'm not sure what other choice makes sense. I want them to hang very straight and stiff so I can reduce the tendency to draw in while I'm weaving.
 Here is one of my loomweights. They are terracotta, based on finds from the fourth century BCE in Macedonia.
 And here is about half the warp, in the late afternoon sunshine. I opened the window to give more natural light for the photo, and the dramatic contrast made most of the photos useless. I kind of like this one, though.
Next up: heddle knitting!


Next up: heddle knitting!
29 February 2012
On to the loom weights
I have learned by doing. The first shed is completely laced to the shed rod! Now I get to turn my attention to those lovely loom weights.
To the best of our knowledge, loom weights aren't meant to be tied directly to hanks of warp. The holes through the weights aren't big and smooth enough to make that a reality. However, the archaeological record for this period and culture does reveal three possible methods for attaching loom weights to warp. All three involve a mediating attachment between the hole(s) in the loom weight and the warp hank: metal rings, sticks, and loops of string.
I considered using metal book rings for the romance of it. While they're not forged bronze, they're easy to work with, and I thought they might contribute to the warp making more of the kinds of sounds Homer attributes to a warp in use. But when I calculated the additional weight it would add to each loom weight, I changed my mind. Although these loom weights are in the zone for fourth-century BCE Macedonian ones, they're not quite as light as I had originally imagined. Accordingly, I don't want to add extra weight to them. Also, that many metal rings in the size I would need (at least 2") would be expensive. While I was willing to expend funds for high quality raw materials and authentic weights, it seemed less pressing to spend it on inessentials when other authentic solutions presented themselves.
I considered using sticks, but not for long. If I were working with a warp that was set less closely together, I would probably give that method much more thought. But it seemed like it would be the fiddliest of the possible solutions. Since this project is more a proof of concept than a masterwork, I thought it best to keep the fiddly bits to a minimum.
I wound up deciding on the third method, one I had long known and understood: the loop of string. This is the method I have used with the doughnut shaped loom weights and my Icelandic style loom.
So now I have to cut 120 pieces of stout linen cord, all the same length, and tie one to each loom weight. Fortunately, that's the kind of work I can do sitting down, perhaps while watching an old movie. I feel the need for a brief respite from all the hours spent standing at the loom.
Then will come the period of sitting under the loom, puzzling out the best distribution of threads per loom weight. Never a dull moment!
To the best of our knowledge, loom weights aren't meant to be tied directly to hanks of warp. The holes through the weights aren't big and smooth enough to make that a reality. However, the archaeological record for this period and culture does reveal three possible methods for attaching loom weights to warp. All three involve a mediating attachment between the hole(s) in the loom weight and the warp hank: metal rings, sticks, and loops of string.
I considered using metal book rings for the romance of it. While they're not forged bronze, they're easy to work with, and I thought they might contribute to the warp making more of the kinds of sounds Homer attributes to a warp in use. But when I calculated the additional weight it would add to each loom weight, I changed my mind. Although these loom weights are in the zone for fourth-century BCE Macedonian ones, they're not quite as light as I had originally imagined. Accordingly, I don't want to add extra weight to them. Also, that many metal rings in the size I would need (at least 2") would be expensive. While I was willing to expend funds for high quality raw materials and authentic weights, it seemed less pressing to spend it on inessentials when other authentic solutions presented themselves.
I considered using sticks, but not for long. If I were working with a warp that was set less closely together, I would probably give that method much more thought. But it seemed like it would be the fiddliest of the possible solutions. Since this project is more a proof of concept than a masterwork, I thought it best to keep the fiddly bits to a minimum.
I wound up deciding on the third method, one I had long known and understood: the loop of string. This is the method I have used with the doughnut shaped loom weights and my Icelandic style loom.
So now I have to cut 120 pieces of stout linen cord, all the same length, and tie one to each loom weight. Fortunately, that's the kind of work I can do sitting down, perhaps while watching an old movie. I feel the need for a brief respite from all the hours spent standing at the loom.
Then will come the period of sitting under the loom, puzzling out the best distribution of threads per loom weight. Never a dull moment!
Subscribe to:
Posts (Atom)